How Much Mulch Do I Need?
How Much Mulch Do I Need?
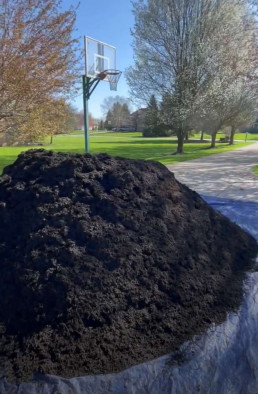
Adding mulch to a landscape is a simple, effective way to spruce things up without a making a complete overhaul—but figuring out how much mulch is needed for a specific project can feel overwhelming.
Figuring out the right amount of mulch for a project doesn’t have to end with multiple trips to the store and overspending on mulch that goes unused.
Utilizing the Greendell mulch calculator, any mulching job becomes a breeze—by customizing results to each project, based on project size, depth, and the desired aesthetic.
Why use mulch?
Mulch provides a wide range of benefits, like helping soil retain moisture, even in the coldest winter months, and preventing weeds from sprouting up around landscaping. It can be found in a wide array of colors and materials, including plastic, rubber, and wood.
Once the type of mulch is chosen, it’s time to calculate the amount of mulch needed.
How many bags of mulch in a yard?
Greendell+Musselman’s bulk mulch is available by the cubic yard. One cubic yard of mulch is equal to 27 feet—so, a space 30 feet in length, 20 feet in width, and three inches deep would require six cubic yards of mulch.
But figuring out that calculation for any unique space is simple, thanks to the Greendell mulch calculator. Just enter the dimensions where mulch will be spread, and the mulch calculator helps calculate the precise amount necessary for any project—large or small.
For most projects, two-to-three inches of mulch is ideal, to help protect the soil underneath from freezing in the winter or getting too hot in the summer months—helping plants grow back richer and healthier each season.
Start Mulching
Mulch is an affordable way to easily spruce up any landscape and provides long-term protection from the elements and invasive weeds. Greendell makes getting started simple—providing the right tools and expertise for any project.

3 Reasons Why You Should Order Bulk Mulch
3 Reasons Why You Should Order Bulk Mulch
Mulching projects can be exciting—and at times overwhelming at first. Attempting to calculate how much mulch is needed, taking repeated trips to the store, and hauling those heavy bags can seem like a big task to take on—which is why buying in bulk is typically the best option.
Bulk mulch is a convenient, cost-effective way to get the job done—no hauling, no heavy lifting, and expert guidance to see any project through.
Bulk Mulch Delivery—Fast, Convenient, Simple
When it comes to ordering mulch, thinking about carrying those bags around can seem like a lot. Ordering in bulk makes calculating how much mulch is needed much easier and alleviates the risk of overspending and overbuying – guaranteeing a one-stop shop for all your mulching needs.
Repeatedly loading and unloading mulch can be physically taxing on the body – and a major deterrent to mulching. With full-service delivery for bulk mulch—there’s no burden of lifting and taking on this arduous process alone.
Buying Bulk Mulch is Cost-Effective
Ordering bulk mulch is made even easier through the Greendell mulch calculator, allowing customers to input their precise mulch specifications into the designated fields. This information helps determine the exact amount of mulch needed to finish the project—without overbuying or ending up short.
In knowing the exact amount of mulch required for a project, customers can easily sidestep the inconvenience of taking multiple trips to the store and wasting money on arbitrary amounts of mulch they may not even need.
That’s why ordering mulch in bulk is the most reliable option for landscaping projects. There’s no unnecessary back and forth to the store or wasteful spending – there’s only a single delivery.
Plus, ordering bulk mulch gains you access to an arsenal of exclusive mulching tools – unavailable for order on their own – that can completely change the way you install your mulch.
The Right Tools to Get it Right
Customer service goes a long way, and getting a project done right means having the right tools and information to make any mulching project come to life.
Bulk mulch is an ideal option for large projects, small flowerbeds, and everything in between and every bulk mulch order includes comprehensive delivery service.
Does the mulch need to be closer to the basketball hoop, near the mailbox, or next to the sidewalk? With bulk delivery service also comes a dedication to keeping promises and completing orders with perfect execution.
Best of all, the threshold a mulch order requires to be designated as “bulk” is kept at a level that can accommodate a wide range of order sizes.
How to Buy in Bulk
Ordering bulk mulch saves time and ensures the right amount of mulch is delivered for every project—and always includes exclusive installation tools, not available anywhere else.
Interested in buying bulk mulch? Click here to start the process and initiate the first step in beautifying your landscape!
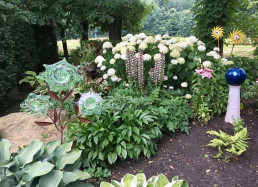
Perennials for Low Maintenance Gardens
Perennial gardens don't have to be so time intensive if you choose to grow at least a few varieties that require little maintenance each season. Here are our top recommendations, all stocked in our Garden Center.
False Indigo
One of the longest-lived perennials native to the American prairies is Baptisia, commonly known as false indigo. While most wild forms are quite tall, the Decadence series from Proven Winners brings them down to just 2-3' tall and wide, about the size of a clump of daylilies. Now everyone can have the fun of growing false indigo, even if you are gardening on smaller city lots.
False indigo is very drought tolerant once established, so you'll only need to provide supplemental water during times of extended drought. It thrives in full sun and hot weather, and does not require fertilizing or deadheading. In fact, if you do cut off the spent blooms, you'll be preventing the formation of its decorative seed pods. So just plant it, then leave it be and it will be fabulous! Zones 4-9 and stocked at Greendell.
Baby's Breath
Who knew baby's breath could be so easy to grow? Old-fashioned varieties gave this perennial a reputation for being a hassle int he garden sine they grew very large and often went dormant by late summer, leaving a big hole in the garden. Festival Star from Proven Winners is a game changer. This improved selection blooms from late spring into fall without deadheading or going summer dormant, and its shorter 12-18" height is easy to manage.
When you plant baby's breath, be sure to amend your soil if it is heavy clay since this plant needs good drainage to grow well. Plant it in a very sunny spot and let it dry out a bit before you water it again. Just like we don't like to sit around in wet shoes, its roots don't like to sit in wet soil for long either. Don't forget to clip some of its fragrant blooms for your fresh or dried bouquets. New flowers will quickly take their place. Zones 3-9 and stocked at Greendell.
Lavender
Sweetly fragrant lavender is always a crowd please, and it's easy to see why. The rich violet purple flowers of lavender bloom from early summer through fall, with new flowers appearing throughout the growing season. They are perfect for using in bouquets, sachets, sweet treats, and lemonade.
Sweet Romance Lavender by Proven Winners is very easy to grow in a sunny, dry spot in your landscape. Planting it in sandy or very well-drained soil will help it grow vigorously and overwinter well in zones 5-9. It does not require fertilization. Trim the foliage back lightly in the spring only if necessary to tidy up the plant. Stocked at Greendell.
Daylily
Even if you don't consider yourself a gardener, chances are good that you've recognized daylilies blooming around town in the summer. One reason why so many people grow them is because they require almost no maintenance other than watering. They multiply reliably year to year, are long lived, and easy to share with neighbors and friends.
Choose from purple, yellow, red, orange, peach, or bicolor varieties. When you plant daylilies, everyday beings fresh flowers to enjoy. Zones 3-9 and stocked at Greendell.
Catmint
Catmint is one of the most requested perennials in the garden centers every year in late spring when people start seeing it bloom around town. It forms a mass of vibrant periwinkle purple flowers that is so dense, you won't even see the foliage when it's in bloom. Bees, butterflies, and hummingbirds love catmint.
Cat's Meow from Proven Winners is a lower maintenance selection because unlike larger varieties, it stays in tidy mound without pruning and won't sprawl all over its neighbors. Just be sure to grow it in full sun and very well-drained soil that is on the dry side. This plant loves warm, sunny days and should be one of the last things you water in the garden. Zones 3-8, stocked at Greendell.
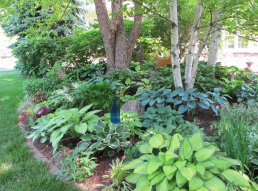
Hosta
If you garden in shade, one of the easiest, low maintenance perennials you can grow is a hosta. It's amazing how hostas emerge from bare ground in spring and grow so quickly to fill large spaces with elegant foliage. After the first few frosts in the fall, the foliage will go dormant again until the following spring. Clean up dead foliage in the fall to help prevent slug issues the following year.
Hostas grow best in organically rich soils and tolerate clay well. In the coolest parts of the country, they will survive in sun, but they are happiest when grown under the canopy of tall trees in zones 3-9. Keep the soil evenly moist for best growth. Many varieties stocked at Greendell.
Switch Grass
These durable perennials will thrive in any soil, from sand to clay, and in any moisture level from dry to wet. The only thing they require is full sun. Switch Grasses can be used as a low maintenance screen, hedge, background planting, or as a focal point in the fall landscape.
Once per year in late winter or early spring before the new growth emerges, cut the entire clump of last year's foliage back with hedge trimmers and compost it. Beyond that, no other maintenance is necessary. Zones 4-9. Many varieties stocked at Greendell.
Sedum
When you feel its succulent leaves, you'll see why sedum (stonecrop) is so drought tolerant. It stores water in its foliage and stems as a reserve, and usually doesn't require supplemental water once the roots are established. Plant it in full sun and very well-drained soil, and do not add fertilizer or organic matter when you plant it. Lean and mean is how sedum rolls -- pamper it and you'll be disappointed.
Sedum comes in many sizes, shapes, and colors. Expect most to bloom in late summer and fall, providing a late season pollen source for bees and butterflies. Leave it alone in the fall and then cut any remaining foliage to the ground in early spring, Many varieties stocked at Greendell.
Russian Sage
During the hottest months of summer, the cool blue flowers of Russian sage are a welcome respite in the garden. You'll love how Denim n Lace by Proven Winners forms a dense, upright clump and is completely covered in flowers beginning in midsummer.
Like sedum, Russian sage is not a plant that enjoys pampering. Grow it in very well-drained, sandy, or rocky soil and do not add fertilizer or organic matter when planting it. It enjoys drier soils and rarely requires supplemental water. The only maintenance it should need is cutting the stems back to 3" tall in early spring before new growth appears. Zones 4-9, stocked at Greendell.
Original article published by Proven Winners
Mulching Perennials
Most plants, including perennials, benefit from having mulch around their roots year-round. Organic mulch like shredded bark or hardwood makes our gardens look more polished, but it also serves several useful purposes including:
- Shading the plants' roots and keeping the soil cooler, which makes the roots healthier
- Retaining soil moisture longer
- Preventing weeds from growing up into the plants
- Adding nutrients to the soil as the mulch disintegrates over time
Inorganic mulches like small stones or gravel can also be used, but they will not have the added benefit of enriching the soil since they do not break down. Stone can be useful in very windy locations where lighter mulch tends to blow away and is sometimes used on steep slopes where lighter mulch would wash away. Just beware that if you ever decide to switch from stone to organic mulch, it is back breaking work to remove those stones.
Whichever type of mulch you use, it is important to prevent it from touching the crown (base) of the plant. Spread your mulch carefully so that is lays nicely under your plant's foliage but away from the crown. When mulch touches the crown, it is an invitation for plant rot and pest issues.
If you plant any perennials or shrubs in the fall, be sure to lay a 3-4 inch layer of mulch around them to prevent frost heaving during the winter months. The mulch will moderate the soil temperature so it remains consistent throughout the winter.
Perennial gardens benefit greatly from having a layer of shredded leaves placed over them in late fall or early winter after the plants have gone dormant. When you are raking earlier in the fall, shred and bag some of our leaved to use for this purpose. By spring, the shredded leaves in your garden beds will have mostly broken down and their nutrients will enrich the soil -- it's free fertilizer!
Original article written by Susan Martin and published by Proven Winners.
10 Back to Basics Gardening Topics
Whether you are an experienced gardener or just beginning, it never hurts to review the basics. Please find below links to videos and articles that cover a wide range of gardening basics, this information will tell you everything you need to know in order to grow a great garden.
- Exposure: What Does Full Sun or Part Shade Mean? will help you better understand the full range of exposure options and the impact your location has on these definitions.
- Plant Zones: Zoning In on Hardiness delves into how to determine whether a plant is hardy for you.
- Water: Watering Container Plants and Should I Water or Is It Going to Rain? details best practices for watering container plants and garden beds.
- Plant Food: Feed Me, Seymour covers the ins and outs of feeding your plants.
- Soil: The Dirt on Dirt is our series of articles that discusses different types of soil. Soil is not a simple or straightforward topic, so more than one article is needed to cover everything. Links to other soil articles are included at the bottom of each article.
- Compost: Garden Gold is all about the basics of composting while Garden Gold, again delves even deeper into this topic.
- Deadheading: To Deadhead or Not to Deadhead explains what deadheading is, why it is important and which plants need deadheading.
- Pruning: Pruning Demystified is a great basic guide to pruning shrubs. However, this four-part series adds depth and details about this important task. Each article links to the next one in the series.
- Seed Planting: This video covers the ins and outs of starting seeds.
- Gardening Terminology: Dictionary of Gardening Terms is a handy guide if you aren't sure exactly what certain gardening terms mean.
Explore landscape design ideas on Pinterest.
Original article written by Kerry Meyer and published by Proven Winners.
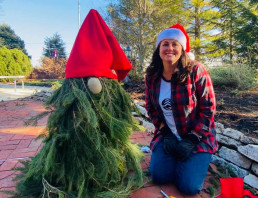
Planting For Winter Interest
Everyone wants an impressive landscape, no matter the season. However, during winter, most people feel as though their landscape becomes dull and boring. Whether you are a seasoned gardener of it’s your first winter with a yard, these winter landscaping ideas will help you make your space beautiful all year round.
Focus on plants with winter fruit
Some winter landscaping plants produce attractive fruits that can brighten your landscape. Plants like hollyberry bushes produce bright red berries that hold onto the trees even in winter. These shrubs can survive extreme weather conditions while still managing to keep your landscape beautiful.
Incorporate needled evergreens
Needled evergreens can add both color and texture to your landscape during winter. Their blue, yellow, or green needles add more appeal and interest to your landscape. An example of a needled evergreen is the Eastern White Pine with beautiful green needles that can make a big statement in a drab winter landscape.
Add Ornamental Grasses
Ornamental grasses are another valuable addition to your winter landscape. When planted close to evergreens, they add some nice contrast to a uniform landscape. The sound of tall grasses rustling in the winter breeze can add some interest to a quiet landscape. You can often find ornamental grasses on sale in the fall and have them planted just in time for the winter season.
Consult a professional
An exciting winter landscape design requires the knowledge and skills of a professional who knows everything about winter landscape plants and their placement. Whether you are a professional landscaper or just looking to improve your home’s landscape, we can help!
Stone Landscape Ideas
Stone Landscape Feature Ideas
Stones are the ultimate enhancers when it comes to landscaping. They can convert the blandest of yards into the most beautiful area of your home. Stone landscape features are perfect for both elegance and functionality as they can handle all unpredictable weather conditions. Below is a list of amazing stone landscape feature ideas you can consider.
Natural Flagstone
Natural irregular flagstone pavers make for an amazing patio or walkway. If you are into a more rustic look, the natural flagstone details achieve the style with charm. When designing a space with natural flagstone, arrange the slabs to fit together like a puzzle. Flagstone is sturdy, durable, and resistant to weather as well as wear and tear.
Paver Patios, Driveways, and Walkways
Utilizing manufactured concrete pavers in your landscape design brings beauty and structure to your outdoor living space. When installed correctly, pavers can withstand heavy traffic and require little maintenance. Unlike poured concrete, installing pavers allows you to play with different color options throughout the design, create unique patterns, and the finished project won’t crack over time like poured concrete slabs often do. We supply quality manufactured pavers from brands such as Unilock, Belgard, and Oberfields.
Rock Gardens
Rock gardens are a great DIY project to involve the whole family. Rocks protect soil and are especially useful in areas with little to no rainfall as they help reduce water loss from the ground while giving your landscape an enticing appeal. Rock gardens are an easy, sometime plant-free way to give a space some extra personality.
Gravel or Decorative Stone Path
A simple gravel or decorative stone path is enough to change up your landscape design. From crushed limestone to river rock or lava rock, there are endless options from all over the country to bring beauty to your design. You can line beautiful flowers along the path to make it even more colorful and appealing.
Stepped Yard with a Retaining Wall
If part of your property is sloped or on a hill, large stone accents can be incorporated to level certain spaces or create steps to better access part of the property. Installing these can be quite complicated and often involve large equipment.
Seek Expert Help for Stone Landscape Feature Ideas
When considering more complicated stone projects such as paver patios and retaining walls, you should look for an expert in outdoor living. We are the best experts offering consultation on a wide range of ideas and designs and can recommend the right contractor for your project.
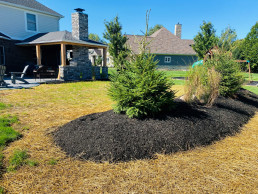
Benefits of Fall Mulching
The Benefits of Fall Mulching
Caring for your lawn doesn’t stop because winter is on the way. In fact, there’s a lot of work you should do for your lawn in the fall. Adding mulch is crucial when preparing for winter and helps your garden recover from the summer heat. Here’s a look at some top benefits of fall mulching.
Control Pests and Diseases
The cold months make plants vulnerable to disease. Applying mulch protects plants from the parasites that live in the soil. Adding mulch regulates the environment and prevents bacteria and fungi from reaching your plants.
To prevent the likelihood of pathogens attacking your plants, it’s advisable to treat the plants with a citric-acid fungicide. When used with mulching, this preventative measure regulates soil and water temperature to ensure your plants are healthy. Mulch also protects your plants from slugs and snails.
Enrich the Soil
Organic matter in mulch decomposes to release nitrogen and minerals. These nutrients enrich your soil throughout the fall and promote healthier blooms in spring. Mulch also provides soil-improving microbes and earthworms, which are essential when preparing for winter.
Applying mulch to your bed nourishes your garden’s ecosystem. However, you should choose the right mulch. Some options you should consider include bark chips for trees, shredded leaves for flowers and shrubs, and straw for vegetable gardens.
Apart from enriching the soil, mulch also prevents soil erosion. Studies show that 24 billion tons of topsoil are lost in the whole world each year because of soil erosion. Mulch prevents the fertile ground from blowing away because of winter storms.
Help with Changes in Temperature
Mulch addresses issues with temperature fluctuations. For example, your soil may be baking under the sun in one week and covered in snow in the next. Mulch insulates the soil from these temperature extremes.
This is especially important for plant roots. Winter temperatures are capable of damaging the fibrous root systems in garden plants. The root hairs increase the surface area of roots, allowing a plant to absorb more nutrients.
Since the root systems are delicate and easily damaged, adding mulch insulates them from cold weather. Harsh winter conditions also affect microbes that are present in the soil. The mulch will allow the microbes to provide the necessary nutrients for your plants.
Moisture Control
Protection from temperature fluctuations goes hand in hand with moisture control. Bare soil heats up quickly because it doesn’t have the insulating layer of mulch. As a result, the soil loses moisture.
During cool evenings, mulch insulates the soil and helps retain the daytime heat. It also prevents frost from destroying your plants. Mulch also keeps the moisture from the wind and sun from drying out the soil.
In Conclusion
Fall mulching is essential for the health and visual appearance of your plants. We are renowned for our services and the quality of our products. It doesn’t matter if you’re a landscaper or just a homeowner interested in improving their landscape, we are here to help! Check out our mulch product line here.
Photo courtesy of Superior Landscape Solutions
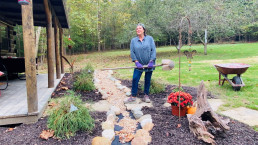
Landscape Tips for Fall
Get Your Landscape Ready for Fall
Most people focus more on their lawns and gardens during the seasons when there’s a reason to showcase a beautifully mowed yard full of flowers or veggies. You’re more likely to want to mow the lawn or garden when the weather’s nice, as well. But the leaves will fall soon, so what steps can you take to keep the health of your lawn up during a chilly season?
Get Ready to Rake
Fall arrives in late September, but leaves will be falling throughout October. Clean the yard of leaves to prevent the vegetation beneath from dying. Rake them into bags for composting down the line. Composting can improve soil health and conserves moisture. This is especially important during cold weather.
Mulch is an option, as well. The two are used interchangeably since both serve similar purposes. Compost is decomposed organic matter and mulch is usually made of dry bark chips from trees. Both are packed tightly at the base of plants and are great for protecting rich soil and can be replaced as little as annually.
However, raking leaves for compost matter your chance to create a natural, self-sustained gardening system every year that will keep your lawn tidy-looking in the process.
Lay Down Some Fertilizer
Prior to the first frost is the perfect time to do a little proactive care as the sun disappears and the first frost arrives. Once it does, vegetation will need to survive for months on end.
The first frost is an average estimate of the day of the year when there is a 50% chance of the temperature falling below freezing. Historical evidence of such occurrences is monitored by the NOAA National Centers for Environmental Information. First frost dates can occur as early as late August, so check your local area for dates.
Fertilizer is more so for plants than the soil itself, making it different from mulch and compost. It should be laid before the ground freezes, particularly 2 to 3 weeks prior.
Prep Your Perennials and Annuals
Your lawn’s transition from Summer to Fall is an important time. It has undoubtedly suffered from the summer sun. Most gardeners opt for perennials because of their longevity, while annuals are restricted to a single growing season. Early fall is a great time to plant perennials, trees, and shrubs because the cooler weather allows for them to grow a strong root system before next spring. You will not want to plant these too long after the first frost, so timing is definitely important.
Annuals will undoubtedly die unless moved to an inner area, like a garage or greenhouse before the winter. We suggest grouping them for warmth. Apply mulch and cover with an inch of water (to the soil only) to trap heat. Additional methods like covering your annuals will protect them from an expected frost that day.
Water the Lawn Up Until You Can’t
Late October is when it’s usually time to unplug the sprinkler and irrigation system. This is so that you can maintain access to the pipes and spigots as they will freeze over during the chilly weather. Until then, continue to take good care to water the lawn until the time arrives to unplug the hose and flush the irrigation system out.
Well-watered soil may be the best defense against the first frost than the best efforts with mulch. Soil can hold heat much longer than mulch, which is bound to lose the heat it provides at some point. You want hardy plants that will survive in nutritious soil year-round, and with these tips, you will.

How To Test Your Soil at Home
When growing a garden, it’s essential to know what your soil lacks so that you can amend it correctly. Fortunately, you don’t always have to rely on an expensive laboratory test to create healthy growing conditions that keep plants thriving. Here’s what you need to know about performing soil tests at home with or without a test kit.
Testing Your Soil Without a Kit
The following DIY soil tests are simple, inexpensive, and will give you fast results and a basic idea about the type of soil you’re dealing with.
Testing for pH
Before testing, it’s important to collect samples from different areas of your garden. Mixing these samples and extracting a composite sample helps to give you more accurate results. Once you have the sample, the next step is to determine if the soil is acidic, alkaline, or neutral.
- Test for alkaline soil. Add about 2 spoons of soil to a bowl, then mix with a small amount of distilled water. Then add ½ cup of vinegar. If the mixture in the bowl produces bubbles or fizzes, that means you have alkaline soil.
- Test for acidic soil. Add about 2 spoons of soil to a bowl, then mix with a small amount of distilled water. Then add ½ cup of baking soda. Again, if the mixture in the bowl produces bubbles or fizzes, that means you have acidic soil.
- Test for neutral soil. If nothing significant happens when you add either vinegar or baking soda, your soil is neutral
This test is based on the chemical reaction between acidic and alkaline solutions. The more strongly the mixture fizzes, the higher the pH. Once you have an idea of your soil’s pH, do your research to find out if the plants you have are more suited to an acidic or alkaline environment.
If you have alkaline (sweet) soil, you can adjust the pH by adding ground sulfur, and if you have acidic (sour) soil, you can adjust the pH by adding limestone.
Testing for Organic Matter
The presence of earthworms in your soil can indicate whether your soil has enough organic matter in it. Earthworms boost your soil’s health because they not only aerate the soil and increase water infiltration, but their castings provide the soil with plant nutrients and enzymes.
The best time to check for earthworms is when the soil is moist - not too dry or wet. Simply dig out about 1 cubic foot of soil and look for earthworms. Five is a good number of earthworms to find, but ten is even better.
Testing Your Soil With a Kit
You can get a soil test kit from various companies that sell landscaping supplies. Generally, a test kit is handy if you want more precise measurements. For instance, it can give you the exact pH of your soil, and most test kits can test phosphorous, potassium, and nitrogen levels.
Testing pH Levels
When using a soil test kit, it’s also important to collect samples from different garden spots, so you end up with a composite sample.
- To begin with, you’ll need a spoon’s worth of soil, which you add to the appropriate chamber of the pH test container.
- Add the test power that comes with the kit and mix it with distilled water.
- Cover the container with a lid and shake thoroughly.
- Let it sit before reading the results
- Compare your sample’s color with the color chart on the container to determine if the soil is acidic or alkaline.
- You can also read the instructions that come with the test kit to get a better idea of how this process works.
Testing N-P-K Levels
When testing N-P-K levels, it’s essential to mix your soil sample with distilled water, then let everything settle down for a few hours.
- When it’s time, fill the different chambers of your testing containers with water from your sample.
- Typically, the different containers have color codes. For instance, everything purple is associated with nitrogen.
- Add the test powder to each container, cover with a lid, and then shake.
- Use the color chart on the containers to interpret the results as seen.
The Bottom Line
Testing your soil at home can help your plants thrive and flourish. One last thing: Remember, amending your soil is a continuous process, so you may need to do several tests before achieving perfect, healthy soil.